
Hey Readers, We hope you’re all safe and sound.
A Weather Station has been one such project that most electronic and IoT geeks have tried making at least once. A weather station is not only a fun project to make but also teaches you several kinds of stuff about electronics and programming. And apart from that, it can actually be used in real life for monitoring purposes.
Goal :

Today, we will be making an IoT Weather Station that measures Humidity and Temperature and sends the data to a cloud server. That data can later be monitored either using a web dashboard and a mobile app (to make it convenient). The UI must be pleasing to look at. Oh yeah! I don’t want to spend a single penny on the back-end.
Problem :
Now that our goal is clear. Here’s the problem, We need an IoT platform that provides both an app and a web dashboard. But sadly, There’s no IoT platform that provides you all that along with a good UI and that too for free.
Don’t believe us? Check for yourself.
And that’s why we have been building SmarDen for Developers. Let’s see how it helps you with the backend.
Solution :
SmarDen.tech i.e. SmarDen for Devs is a platform that provides you with the complete backend solution for your projects. SmarDen for Devs enables you to focus just on the hardware and learning part of your project and takes care of the rest. It provides you with a striking-looking dashboard that you can customize according to your needs. It has a web-based app that you can access by visiting SmarDen.tech and an app that you can install via the Play Store. Both the app and web dashboard are synced real-time and you get real-time feedback on both as well.
Okay okay! That’s enough bragging about our own IoT platform. Now let’s get into building the weather station.
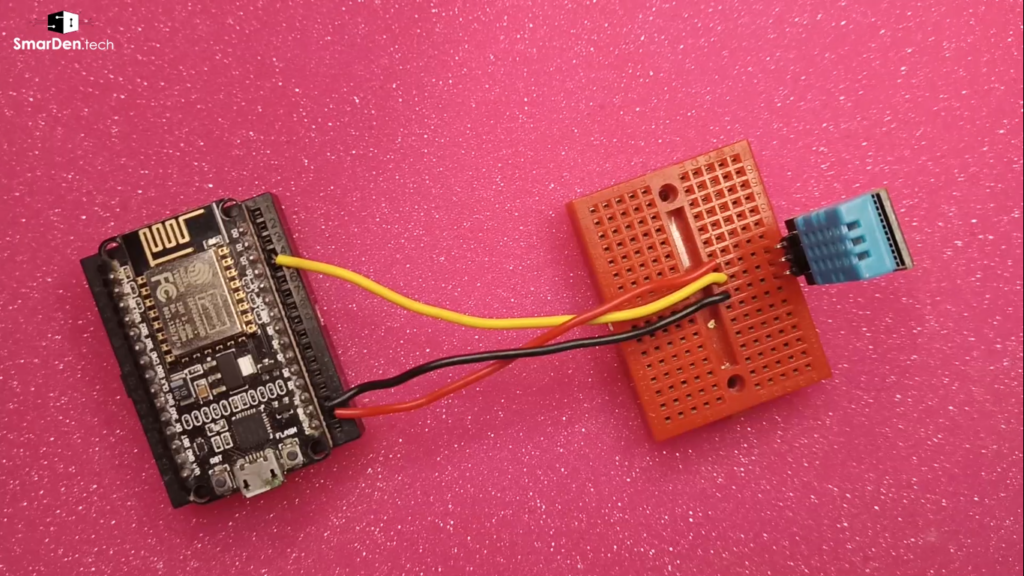
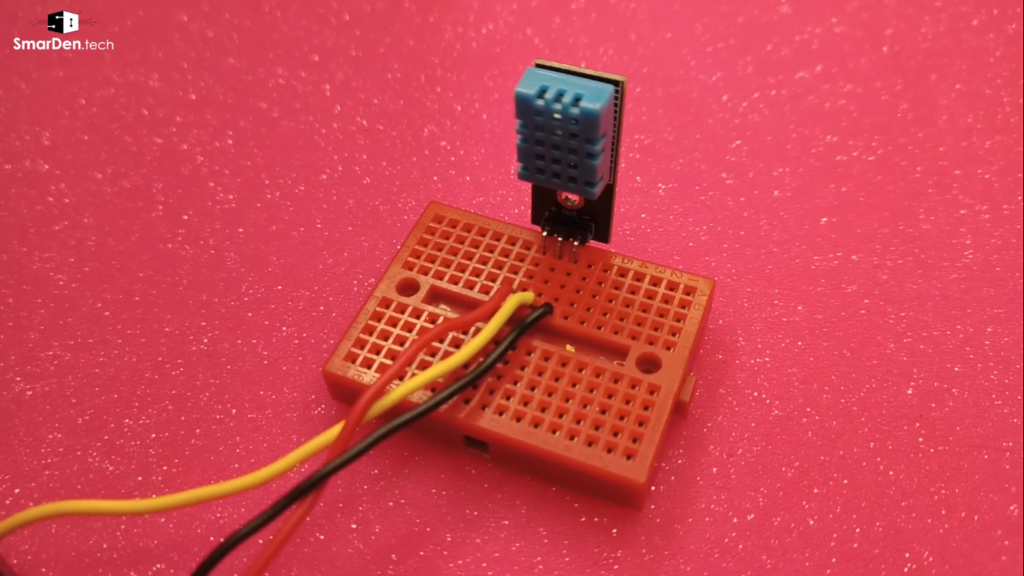
Setting up the Hardware :
Let us get our hardware ready before getting into anything else.
Things you need :
- NodeMCU ESP8266
- DHT11 Temperature and Humidity Sensor
- Jumper Wires and Breadboard
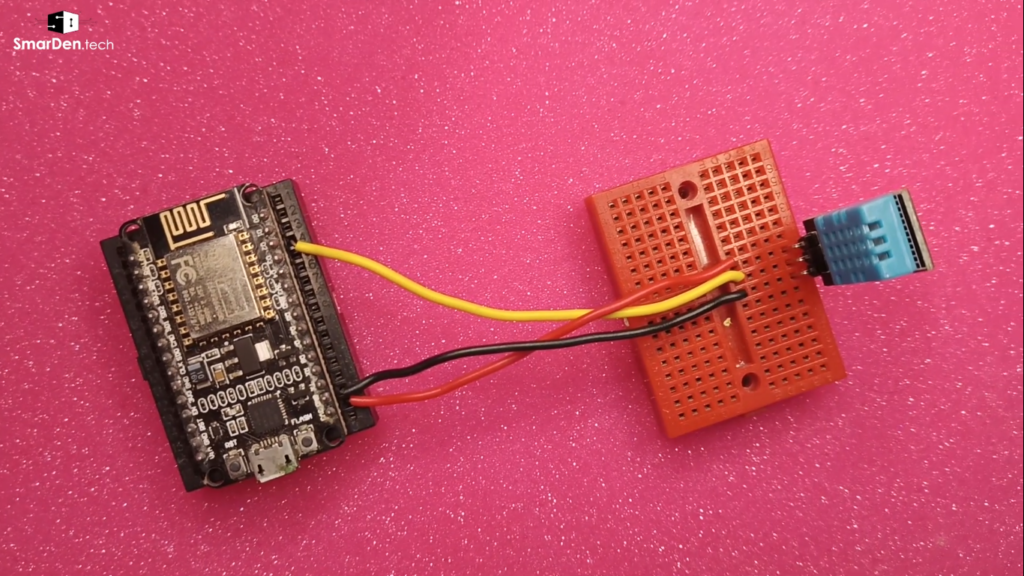
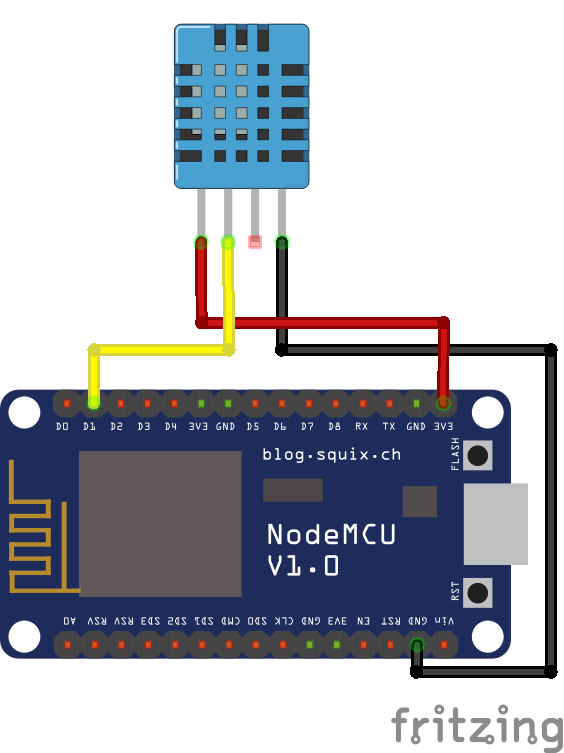
Connections :
The connections are pretty straightforward. You just need to connect three pins. All three connections are shown in the circuit diagram below.

Setting up SmarDen.tech :
Now that you have made the connections. Let’s focus on setting up the IoT dashboard for our project. But before that, let me give you a basic understanding of how SmarDen.tech works?
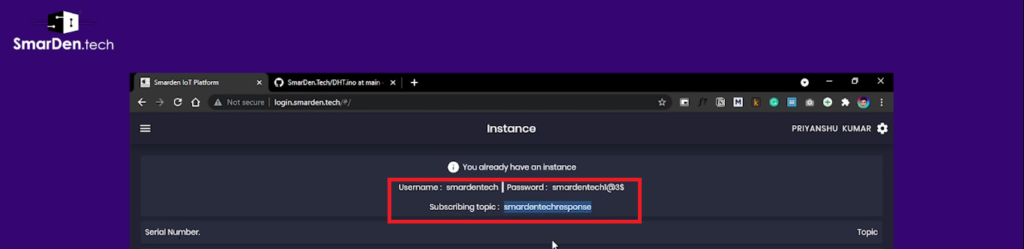
After visiting SmarDen.tech, there are few things you need to set up. The first is creating an Instance. What is an instance?
Instance :
The instance is like your own MQTT server inside SmarDen.tech. It is used to establish and identify the connection between your hardware, cloud platform, and mobile application. Creating an Instance gives you username, password, and a subscribing topic, that we’ll be using while programming.
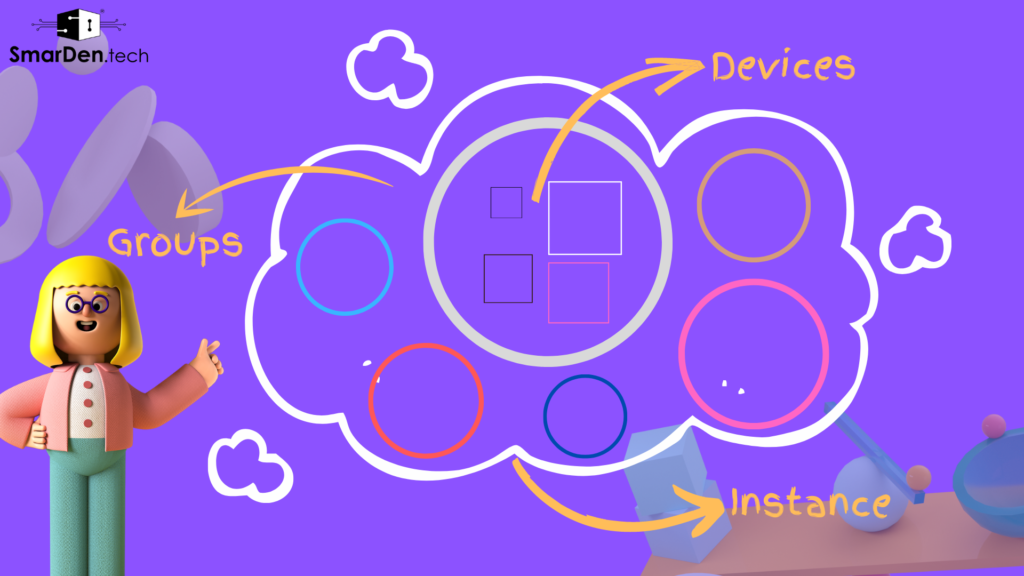
Components: There are different components that you can integrate with your SmarDen Dashboard. The Hierarchy goes that way – Groups -> Devices -> Elements.
Groups :
Groups: First you need to create a group so that you can add multiple devices to that group. The Group name can be anything like Sensors, Living Room, Switches, Bed Room, etc.
Devices :
After creating the Group, you can now create your own device by clicking on the devices option. Here you can choose a device name like “LED” or “Fan”, then you need to select a group and then click on create. Once the device is created you’ll be seeing the “Device ID” associated with that device. You’ll be needing that device ID while programming your IoT device.
Elements :
Elements: In the Elements section, you can create a UI element that will help you in monitoring or controlling your IoT Device. You can click on Add button to add an element to the dashboard. It will ask you about the “Component Name”, here you need to enter the name of your element. Then you’ll have to select a device under which you want to create this element. Then you need to select the device type – either it is a sensor or a switch.
Programming :
Now that we have set up the dashboard, Let’s move on to programming our microcontroller that is ESP8266 in this case. The code for this project is fairly simple. If you’ve worked with DHT11 before, you already know how it’s done. We just have to send the data received by the sensor to your instance in SmarDen.tech and for that, we will use your unique id, password, and device id.
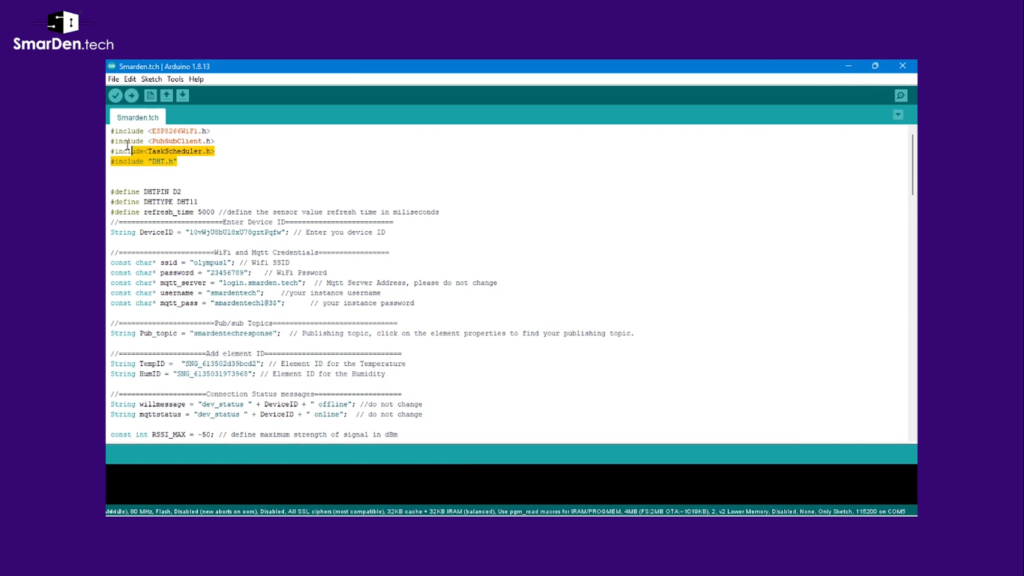
You can find the necessary explanations and the Sample code from SmarDen for devs’ GitHub.
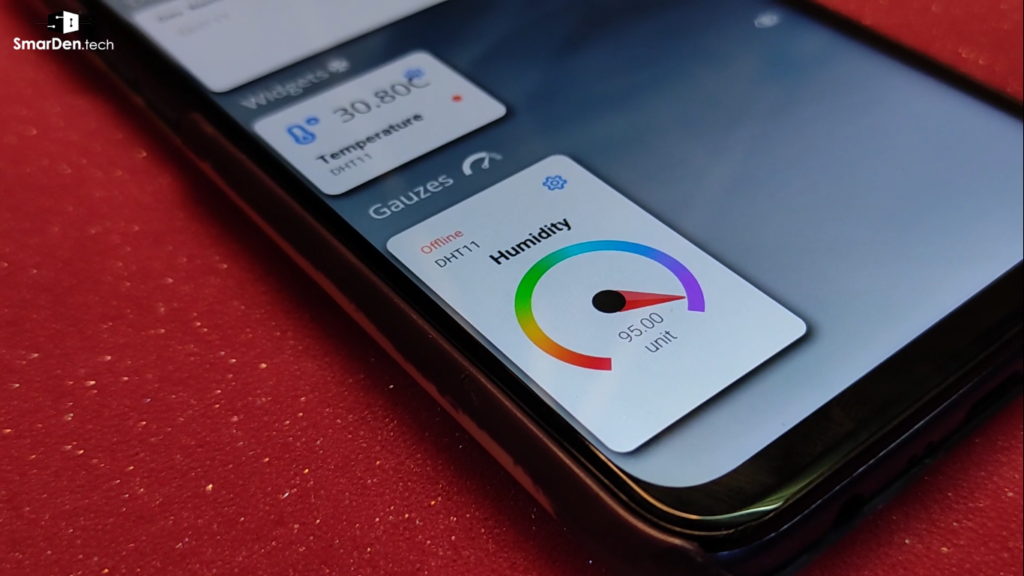
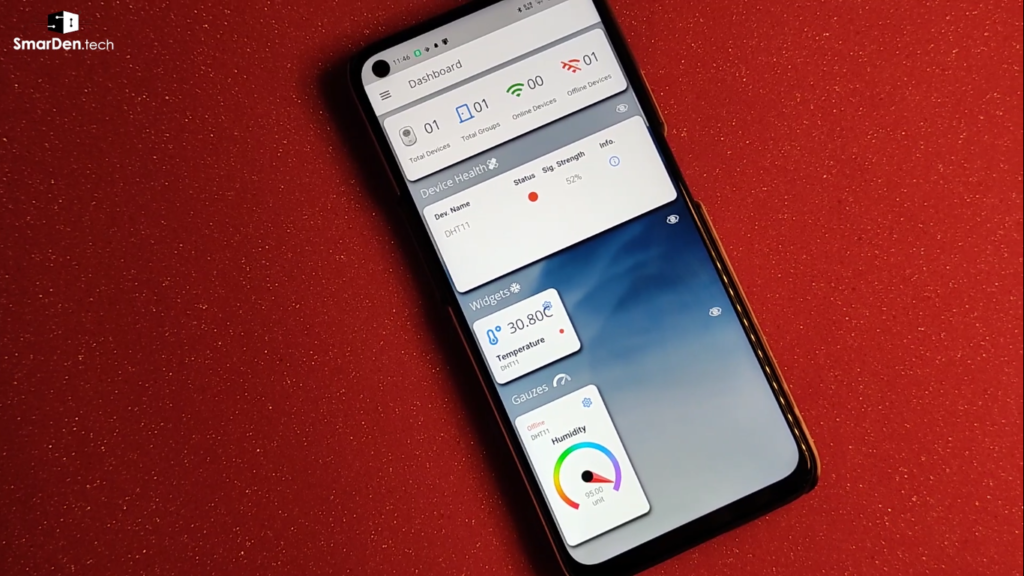
Project in Action!
Aaanndd!!!! We’re DONE! Upload the code to the board and see the widgets and gauge updating in real-time. Both in the web app and mobile app.
Recent Comments